
In 2012 when I was learning Python and wanted something enjoyable to work on, I played around with Pygame. Pygame as what can be inferred from its name, is a game development framework for the Python programming language. It is not as sophisticated as Unity, Unreal, or Game Maker but a good starting point for game development if your learning style involves understanding what’s happening under the hood before going for low-code platforms.
Back then, I documented my exploration through blogging which resulted to blog entries about background rendering and sprite animation to name a few. Up to this day, those blog posts still generate traffic. I should admit though that there are a lot of poorly written codes in there. I never had the time to refine any of them until this year when I chose to respond to a creative prompt with code. The short video below can explain it.
To redeem myself a bit, I have decided to write this quick tutorial of how I built on my previous codes to create a more sophisticated version of a snake game which I called Cat Chase. If you want to see a preview of the game, make sure to check the video above. You may also get the source codes here.
Prerequisites
- Python 3.8 – If your machine is running an old version of Python, you might want to consider upgrading now. For Mac users like me, I found this guide helpful.
- Pygame 1.9.6
Folder Structure
| images/ | Contains the image source for both the animated and non-animated graphical elements of the game |
| maps/ | Contains the maps that can be used in the game |
| maps/map1.py | The default map |
| utils/ | Contains general-purpose codes |
| utils/spritesheet.py | Third-party code available here used that function as helper in processing sprite sheets |
| game.py | The main file; the only file one needs to run to start the game |
| sprites.py | File containing the classes for the sprites used in the game |
Codes
Map

map1.py
The map acts as the stage for the game. It has the backdrop and all other stationary elements.
#assigns source image
SOURCE = pygame.image.load('images/TileA4.png')

p = pygame.Rect(288, 0, 32, 32) #area of source image containing pavement
g = pygame.Rect(416, 0, 32, 32) #area of source image containing grass
s = pygame.Rect(288, 160, 32, 32) #area of source image containing sand/dirt
b = pygame.Rect(288, 320, 32, 32) #area of source image containing bush
l = pygame.Rect(64, 160, 32, 32) #area of source image containing logs
h = pygame.Rect(416, 128, 32, 32) #area of source image containing hedge
Position of interesting portions of the source image [of the background] is stored in variables for quick use. Each portion is 32×32 pixels. The hedge will be used as barrier i.e. a block that can stop the snake’s movement ending the game.
# coordinates of barriers or hedges in the game
barriers = [[96, 64], [128, 64], [160, 64], [544, 160], [544, 192], [448, 224], [480, 224], [512, 224], [544, 224],\
              [448, 256], [256, 320], [288, 320], [320, 320], [352, 320], [64, 384], [96, 384], [128, 384], [160, 384]]
Positions/coordinates of the barriers are stored in a variable for quick collision detection later.
# matrix containing the pattern of blocks to be rendered
MAP = [[g,g,g,g,g,g,g,g,g,g,g,g,g,g,g,g,g,g,g,g],\
       [g,g,g,g,g,g,g,g,g,g,g,g,g,g,g,g,g,g,g,g],\
       [g,g,g,h,h,h,g,g,g,g,g,g,g,g,g,g,g,g,g,g],\
       [g,g,g,g,g,g,g,g,g,g,g,g,g,g,g,g,g,g,g,g],\
       [g,g,g,g,g,g,g,g,g,g,g,g,g,g,g,g,g,g,g,g],\
       [g,g,g,g,g,g,g,g,g,g,g,g,g,g,g,g,g,h,g,g],\
       [g,g,g,g,g,g,g,g,g,g,g,g,g,g,g,g,g,h,g,g],\
       [g,g,g,g,g,g,g,g,g,g,g,g,g,g,h,h,h,h,g,g],\
       [g,g,g,g,g,g,g,g,g,g,g,g,g,g,h,g,g,g,g,g],\
       [g,g,g,g,g,g,g,g,g,g,g,g,g,g,g,g,g,g,g,g],\
       [g,g,g,g,g,g,g,g,h,h,h,h,g,g,g,g,g,g,g,g],\
       [g,g,g,g,g,g,g,g,g,g,g,g,g,g,g,g,g,g,g,g],\
       [g,g,h,h,h,h,g,g,g,g,g,g,g,g,g,g,g,g,g,g],\
       [g,g,g,g,g,g,g,g,g,g,g,g,g,g,g,g,g,g,g,g],\
       [g,g,g,g,g,g,g,g,g,g,g,g,g,g,g,g,g,g,g,g]]
The map has 20 rows and 20 columns for blocks of size 32×32 pixels. It is mostly filled with grass (represented by ‘g’) as shown, with some hedges (represented by ‘h’) consistent with the coordinates stored in barriers.
Sprites
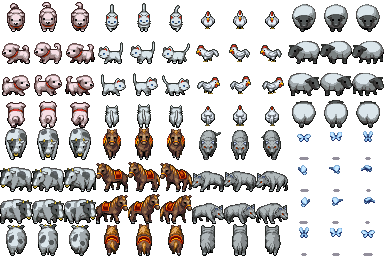
Since this is still a snake game, I have retained the terms snake and food for the sprite classes. But in the game, the cat represents the food and the line of puppies represents the snake. Sticking to the terms snake and food will be particularly useful should you decide to use a different sprite for food and snake. For instance, you may use an insect as food and a line of bats as snake, but in essence it is still a snake game.
Food Class
class Food(pygame.sprite.Sprite):
  #private constants
  _DEFAULT_SIZE = [32, 32]

  #images
  _IMG_FACE_NORTH = (128, 96, 32, 32)
  _IMG_FACE_EAST = (128, 64, 32, 32)
  _IMG_FACE_WEST = (128, 32, 32, 32)
  _IMG_FACE_SOUTH = (128, 0, 32, 32)


  def __init__(self, position):
      #parameter validation
      size = Food._DEFAULT_SIZE
      if position == None:
          raise Exception('Invalid position.')

      self.filename = 'images/Animal.png'
      ss = spritesheet.Spritesheet('images/Animal.png')

      #initialization
      randompos = random.choice([self._IMG_FACE_NORTH, self._IMG_FACE_EAST, self._IMG_FACE_WEST, self._IMG_FACE_SOUTH])
      self.size = size
      self.image = ss.image_at(randompos, colorkey=-1)
      self.rect = self.image.get_rect()
      self.rect.topleft = position
The sprite sheet has an images of the cat facing in different directions. Storing the position of this cat images in the sprite sheet allows us to have up to four different looks for the cat. A random image is selected upon instantiation.
Snake Class
Private Classes
There are two private classes within the Snake Class namely _SnakeHead and _SnakeTail. Like what the names imply these are classes representing the head and tail blocks respectively. They are both initiated with a sprite image facing the last direction assigned to the snake. The _SnakedHead instance will use an image of a mature dog while the _SnakeTail instance will use a set of images of puppies. Both classes have an update_image method() that animates the images as the snake moves.
Attributes and Key Methods
class Snake(pygame.sprite.Sprite):
  #private constants
  _DEFAULT_SIZE = [32, 32]
  _DEFAULT_POSITION = [96, 96] #space given to tail of length 2

  #images
  _HOTSPOTS = {
      'north': [(32, 96, 32, 32), (0, 96, 32, 32), (64, 96, 32, 32)],
      'east': [(32, 64, 32, 32), (0, 64, 32, 32), (64, 64, 32, 32)],
      'west': [(32, 32, 32, 32), (0, 32, 32, 32), (64, 32, 32, 32)],
      'south': [(32, 0, 32, 32), (0, 0, 32, 32), (64, 0, 32, 32)]
  }
The snake class has a concept of hot spots. This is similar to how the relevant portions of the sprite sheet is stored for the Food class but instead of having one image facing each of the four directions, the Snake class uses three images for each direction.
The SnakeMove class functions like an enumeration with a method to validate the input direction. This is a bit of an overkill from the previous tutorial.
#parameter validation
if Snake.SnakeMove.SnakeMove_is_member(direction) != True:
  raise Exception('Invalid movement direction.')

#initializes new position
self.direction = direction
newheadposition = [self.head.rect.topleft[0], self.head.rect.topleft[1]]
newheadposition = self.get_adjusted_pos(newheadposition, frame_width, frame_height)
The move method is the one called by the game script to make the snake move. It returns True if movement was successful and False if not. The game ends when the snake can no longer move. It starts with computing for the correct position of the snake blocks. Note that each block in the game is 32×32 pixels which means that the blocks also move by 32×32 pixel steps.
if self.did_collide(newheadposition, barrierposarr):
  return False

if self.occupies_position(newheadposition):
  return False
Then it checks if it collided to any of the barriers. If not, it then checks if the head collided to its body.
#moves the head to its new position
self.move_tail(self.head.rect.topleft)
self.head.rect.topleft = newheadposition

return True
If no collision happened, the head and tail blocks are moved to their new positions. This means the head moving to the block indicated by the most recent direction and the tail blocks occupying the position left by the block that moved in front of it.
Game
def start_game():
  global is_done, direction, is_paused
  create_food()

  while not is_done:
    render_background()

    if direction == None:
        direction = INITIAL_DIRECTION

    #checks for changes in direction and validates it
    process_action()

    if is_paused:
      continue;

    #updates the display
    update_display()
The main method in the game script is called start_game() which starts the game by creating/displaying a food and then starting a loop that continuously updates the display applying any input received from the player along the way.
def update_display():
  global is_over, direction, score, snake, food, updatetime, game_map
  currenttime = pygame.time.get_ticks()

  if not is_over:
    if currenttime >= updatetime:
      moved = snake.move(direction, DEFAULT_SCREEN_SIZE[0], DEFAULT_SCREEN_SIZE[1], game_map.barriers)
      is_over = True if not moved else False

      if snake.occupies_position(food.rect.topleft):
        create_food()
        snake.lengthen_tail()
        score += 1
        display.set_caption('Cats Chased: ' + str(score))

      render_food()
      render_snake()

      pygame.display.update()
      updatetime =  currenttime + DEFAULT_UPDATE_SPEED
  else:
     display.set_caption('Cats Chased: ' + str(score) + ' GAME OVER - Hit Enter to restart game.')
process_action() simply gets the keys pressed by the user and assign meaning to it e.g. set new direction to UP if user presses the up button or pause the game if the user presses the space bar. update_display() on the other hand triggers more significant events.
moved = snake.move(direction, DEFAULT_SCREEN_SIZE[0], DEFAULT_SCREEN_SIZE[1], game_map.barriers)
is_over = True if not moved else False
It initiates the snake’s movement when it’s time to update the screen.
if snake.occupies_position(food.rect.topleft):
  create_food()
  snake.lengthen_tail()
  score += 1
  display.set_caption('Cats Chased: ' + str(score))
If the snake hits the food, creates a new food, lengthens the tail of the snake, updates the score, and updates the caption with the new score.
To see the game in action, you may download all the resources here. You can control the snake by the arrow keys, pause the game using the space bar, and restart by pressing Enter. -mB
Thanks for dropping by. It will be great to get your feedback so please answer the quick poll below. If you want to stay in touch, follow me in social media or follow this blog via email. I am also currently offering free consulting on tech and software teams management. If you want to learn more about this, check out this link.
